Harry’s request could not have been more timely as I’ve been planning to make up a few different line widths to share with readers so that you too can try this. The sheets have pretty thick, dark lines (but not as dark as the NEW Bold Lines edition! See below!) that can be seen through most standard writing paper. I’ve tested these sheets in my Rhodia Uni Blank for several weeks.
If there’s interest, I can make up other sizes as well. Just let me know in the comments what you prefer.
Using a guide sheet with a blank notebook gives a lot more flexibility. You can sketch and free form on some pages and then use the guide sheets when you want to write. It also means that you get the line spacing you want instead of what the manufacturer decides is best. Write larger? We have a guide sheet for that. Prefer graph paper? We got you covered? Want to mix it up depending on the pen you’re using? That’s where guide sheets really shine. Way more flexibility.
I had a request for an A5 version with darker lines so that the guides would be visible through heavier weight paper or would be easier to see. I created the Bold Lines Edition in A5 to start with all the same lined, graph and dot grid as our found in the new All-in-one PDF, just with a heavier black line to improve viewing. Please give me feedback and let me know if you find them useful.
Field Notes “Dime Novel” Edition
</li>
</ul>
</p>
<p>Print out your favorite line width spacing on a laser or ink jet printer. One copy of the guide sheet can be kept in each of your favorite notebooks and should last for a long time. If you print the guide sheets on heavier weight paper or card stock it can double as a blotter sheet, pen primer or to protect the next sheet from pesky bleed through.</p>
<p><img src=)
Ink Journal offers some additional downloadable guide sheets to fit Field Notes-sized and standard Midori Traveler’s Notebooks. They offer bullet journal templates, lined, dot grid and script practice sheets as well as their ink collecting template. These work great with their Tomoe River paper journals.
These new sizes have been trimmed down width-wise so there’s no overhang in your pocket notebooks. I’ve also added 3-up layout on a US letter sized sheet.
If you don’t have a PDF app on you computer, I recommend Adobe Acrobat Reader. When printing, be sure that you choose to print at 100% (or “actual size”), do not choose the “fit to paper” option. I ran the lines to the end of the template to maximize guides. Your printer might trim the edges a bit.
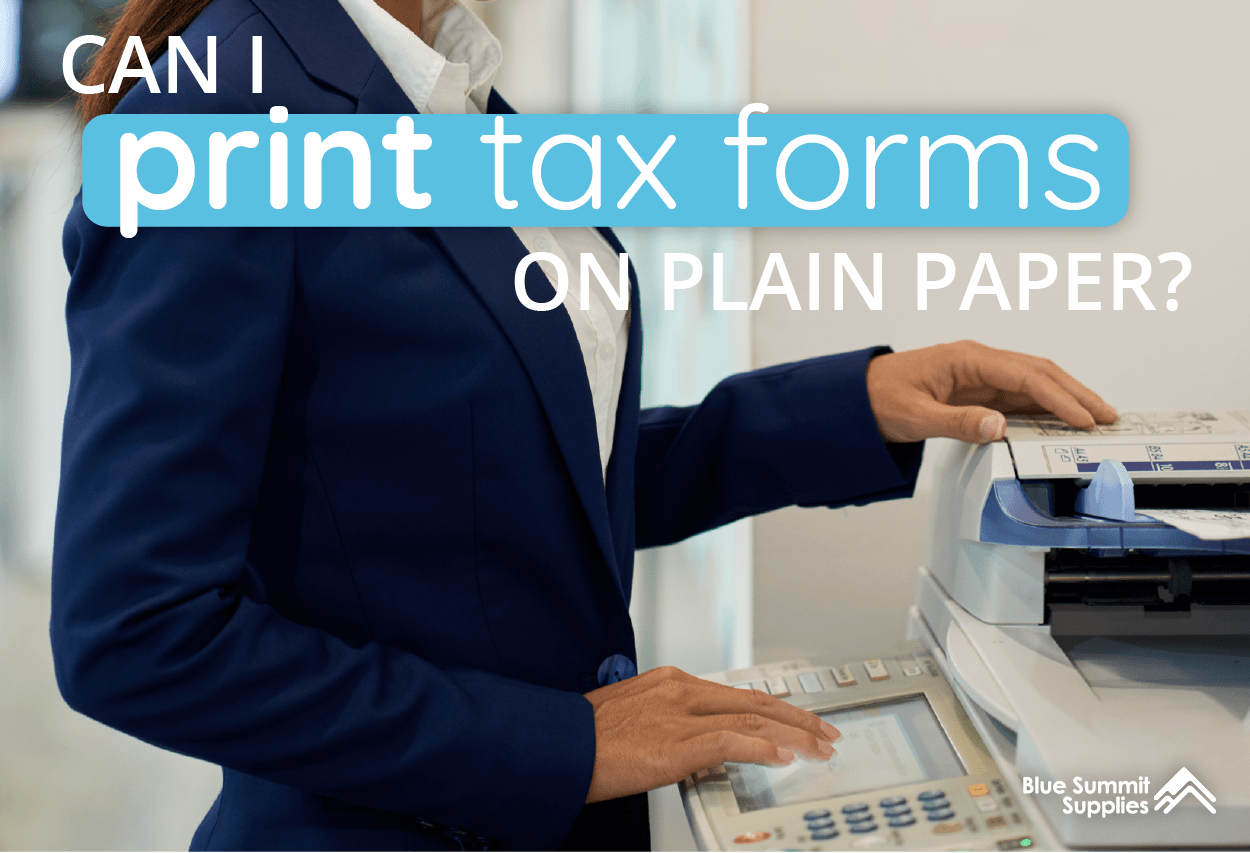
When it comes to tax forms, there are some strict printing and paper guidelines to adhere to:
One way to get started e-filing your federal taxes is by using the options on the IRS website. Depending on your income, the IRS now provides free file software and forms, that can be used to easily complete the process.
Beginning with tax year 2020, nonemployee compensation will no longer be reported in Box 7 of the 1099-MISC form. Instead, all nonemployee compensation must now be reported on a separate Form 1099-NEC. If you pay an independent contractor nonemployee compensation, you must separate nonemployee compensation payments from all of your other Form 1099-MISC payments. Click here to learn more, or buy 1099-NEC forms here.
If you’ve decided it would be better and easier to enter data onto your tax forms using a computer, then TFP software can help you do just that. TFP software not only helps you to legibly complete all of the needed information, but it also walks you through what to enter and where. Additionally, the layout of the software helps you avoid errors on your tax forms that could lead to headaches down the road. Often, the software comes in bundles with tax forms and envelopes so that you can purchase everything you need at once.
Handwritten Tax Forms Guidelines

Everyone knows that taxes are inevitable and usually not fun to think about or to complete. However, with the right tools, the process becomes much easier and less of a hassle. Although you may be tempted to complete everything on your own, if you have questions, it’s always best to contact the IRS or a tax professional before completing or submitting any tax forms.
The IRS and most tax professionals urge clients to use e-filing rather than submitting handwritten tax forms. In fact, if you are distributing more than 250 Form 1099s, you must e-file. Additionally, by 2022, almost all businesses will be required to e-file, so it makes since to get used to this now.
- Saving time. If you e-file, you’ll save time not running to the post office, office supply store, and handwriting your forms.
- Avoiding mistakes and fines. According to the IRS, only 1% of e-filed returns contain mistakes, while around 20% of paper returns do. And, remember, when it comes to the IRS, sometimes mistakes equal fines, which is something we all want to avoid.
- Receiving your refund more quickly. Since there are often less mistakes on e-filed forms, that means that it will take the IRS less time to process your return.
- Using less paper. Not only does this help the environment, but it also saves you money in printing and paper costs.
- Use block print rather than script or cursive writing. Most people use a combination of printing styles in their natural handwriting, so this can be harder than you might think. When using block print (all caps), you’ll need to also make sure that each letter is about the same size. This might sound easier than it is in practice, so practice on another paper before going ahead on your tax forms.
- Do not use hyphens, apostrophes, dollar signs, ampersands, asterisks, commas, or other special characters in the money amount boxes or on the payee name line.
- Print all of your data in the middle of the blocks, leaving plenty of space between each letter or number. Since the forms will be read by a machine, it’s important that the computer can easily tell where one number ends and another begins.
- Only use black ink. Forms filled out in any other color will be rejected.
- Include the decimal point and cents for all dollar amount entries. For instance, $120 should be written as 120.00.
- If a box does not apply, leave it blank. Do not enter 0, “None,” “NA,” a dash, or anything else into the boxes. The only exception to this would be if you are specifically asked to enter a 0 (zero).
- Do not staple or cut anything. Even if part of a form is left blank, you still need to include all parts and pages.
- All forms must be submitted as an original handwritten document. In other words, do not send in photocopies of any tax forms.
- You should not make any erasures, cross-outs or whiteouts. If you’re filling out a Form W-2, then the Copy A portion (the page printed with red ink) must be totally error free.
- Follow the IRS mailing guidelines, such as not folding documents and using a flat mailer instead of a typical envelope.
As you can see, even though it might sound easier in theory to complete the information on your tax documents by hand, in practice, it may be much more difficult and time consuming to complete your forms this way. If you go ahead with handwritten forms, make sure to make yourself photocopies for your records.
The IRS and most tax professionals urge clients to use e-filing rather than submitting handwritten tax forms. In fact, if you are distributing more than 250 Form 1099s, you must e-file. Additionally, by 2022, almost all businesses will be required to e-file, so it makes since to get used to this now.
Whether you’ve decided to complete handwritten tax forms, use a typewriter to fill them in, or complete them on a computer and print them out, there are several ways you can obtain and/or complete your tax forms.
Handwritten Tax Forms Guidelines
To help you out, this article will explain the requirements and options for preparing and submitting tax forms such as W-2s, 1099s, and returns. The topics we’ll cover include:
- Saving time. If you e-file, you’ll save time not running to the post office, office supply store, and handwriting your forms.
- Avoiding mistakes and fines. According to the IRS, only 1% of e-filed returns contain mistakes, while around 20% of paper returns do. And, remember, when it comes to the IRS, sometimes mistakes equal fines, which is something we all want to avoid.
- Receiving your refund more quickly. Since there are often less mistakes on e-filed forms, that means that it will take the IRS less time to process your return.
- Using less paper. Not only does this help the environment, but it also saves you money in printing and paper costs.
Although the IRS will accept handwritten forms, they do caution that the writing must be completely legible and accurate in order to avoid errors in processing. In fact, most accountants, myself included, would tell you that more often than not, handwritten forms lead to errors and delays in processing. Of course, you may still want to pursue this option, but you should definitely weigh your other options for filling out and submitting tax forms before making a final decision.

Blank books provide a great way to encourage kids to write. Here are directions to make 3 different versions of blank books for your kids.
Use a scissors to cut the crease in back of the park bench only. Do not cut the seat of the park bench.
After making a bunch of these stapled sheets, I use a paper cutter to cut the sheets in half as shown.
Once you develop a system and get into a groove, assembling a pile of blank books for your preschoolers is an easy project that can be done while binge-watching TV #hellonetflix. Here are 3 different versions of blank books that you can easily make for your kids. I have also included a little video tutorial for each of the methods below.
#1 The Mini Blank Book
- Writing Center – This is the most obvious place to house some blank books. Kids can create books and can practice writing letters or thematic words.
- Science Center – Kids can make predictions or record observations.
- Dramatic Play Area – Kids can use them to make shopping lists, menus, scrapbooks, phone books, etc.
- Block Center – Place blank books in your block center so that kids can make a plan or blue print….or they can make a drawing of their structure.
- Math Center – Kids can practice representing numbers with drawings or stickers and they can practice writing numerals.
- Travel Journal
Take that hamburger and fold the long sides together to make something that looks like a park bench. The folded edge is the back of the park bench.
Now that you have made a bunch of blank books, where can you use them? You can use them all over the place to create an invitation to write. Here are just a few ideas:

When my children switched from workbooks to textbooks, they had trouble producing a neat, orderly math paper. Checking their work was very difficult! So, out of necessity, I had them do their math on paper that had blocks drawn on it. One math problem was to be worked per block. This helped with the orderliness, but not with the neatness. My solution with the neatness problem was to have them write the numbers 0-9 neatly across the top of the math paper before each lesson. This helped to remind them to write neatly throughout the lesson. During grades 4 and 5, it helped each of my children to have a multiplication table handy when they did their math and by the 6th grade they had no need of the table any more.
It isn't enough to just say, "You missed this one." You should go over the missed problem, find the error that your child made, then go over it with your child. You will discover that many errors are simple errors, [adding instead of subtracting, not carrying numbers, forgetting to borrow, making mistakes when copying the problem from the book]. Learning to be neat, and then being neat, helps with the simple errors. Once your child is aware that he makes these simple errors and realizes the importance of neatness, and paying attention to the pluses and minuses, then he should do better. [It's a process that takes a long time.] Until then, gentle reminders about neatness and carefully copying the problems are in order.
To mom: When your children are learning a new concept it is important for them to "show their work." That means that they should write out the entire problem and work it on their paper, not on scratch paper. This is important because if they make errors, you can see what they did wrong. This makes correcting math more productive.
The printable math work paper below has all of the features that might help your child make the switch for workbook to text. After a while your child will not need to use this paper. My children later used sewn composition books. I wrote about that below.
Papers Designed for Math Work from a Text Book
Doing problems "in their head" is ok after they have learned how to do new concepts and as long as they are not missing the problems. If they start missing the problems, have them show their work again so you can determine what they are doing wrong.
Some of the daily lesson papers state:
"Show your work. Write one problem in each block."
If your child is confused about this when using the graph-block paper, explain that the "block" is the large rectangular area that is enclosing the graph lines.
The math lesson paper is divided into 10 blocks per sheet. One set has a graph in the blocks and the other one does not. Then you have the choice of using the files with or without the multiplication printed around the paper.
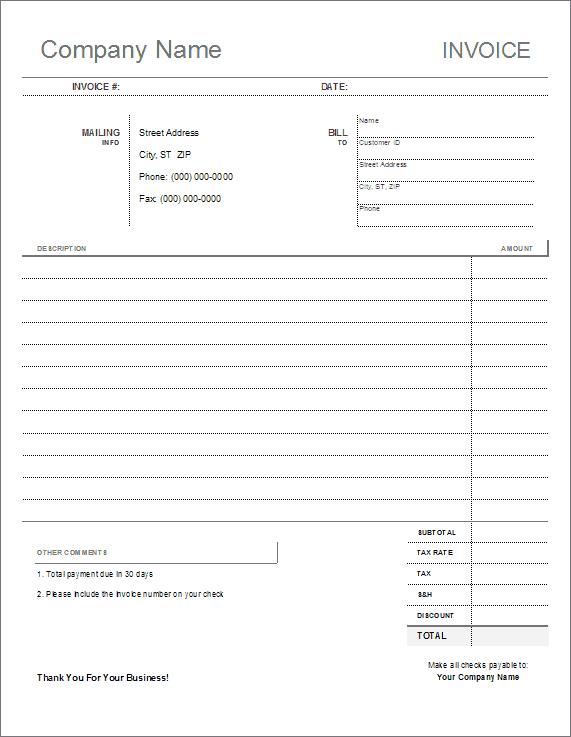
There are plenty of small businesses that still use a blank invoice form to bill their customers. This is common for repair services that visit a home or business and collect a check immediately after work is done. The customer should always receive a receipt, and an invoice can act as the receipt. If you are looking for a blank invoice other than what you can find at your local office supply store, try our free Blank Invoice Template below. If you are handy with Excel, you could also try modifying one of the invoice templates listed on the right.
This printable blank invoice template uses an ink-friendly design to save printing costs. It is meant to be printed and filled out by hand, so it contains no formulas.
Customize It: The first step is to customize the blank invoice template by editing the header with the name of your business, inserting a logo, etc. Then edit your mailing address and the line at the bottom that says who to make a check out to. After you are done customizing it, print as many copies as you need.
In the Field: When using the blank invoice in the field, you can use a clipboard and some carbon paper that you can get at your favorite office supply store. Yes, I did say carbon paper, because you are going to want to keep a copy of the receipt for your own records as well as give a copy to the customer. So, you'll need two copies of the blank invoice each time you fill one out in the field.
Blank Invoice Template
An alternative to using this blank invoice template is to pay a commercial printing company to print a custom invoice for your business on carbon paper or as a receipt book.